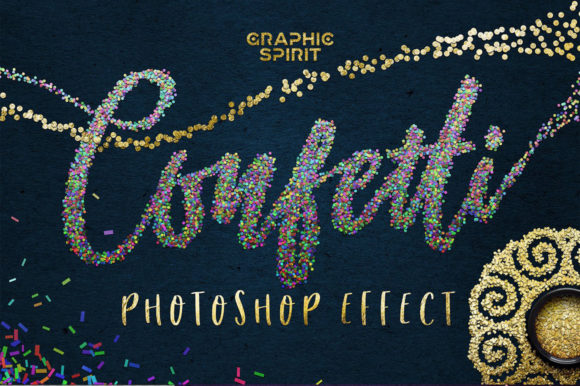
Confetti Effect for Photoshop: Creating Joyful, Print-Ready Designs Instantly
In the world of digital design, few elements convey celebration quite like scattered confetti. Whether you are designing a birthday invitation, a wedding announcement, or a festive social media graphic, adding that touch of whimsical chaos can transform a static layout into a dynamic visual experience. However, achieving a realistic and aesthetically pleasing Confetti Effect for Photoshop manually is often more challenging than it appears. Designers frequently struggle with lighting, perspective, and the sheer time consumption of placing individual elements. This is where specialized tools and actions come into play, offering a streamlined solution for creating super joyful and colorful designs without the technical headache.
The Challenge of Manual Confetti Design
For many creatives, the goal is simple: create a design that feels alive and celebratory. Yet, the process of manually scattering confetti in Adobe Photoshop can be tedious. You might start by painting small dots, but they often look flat and uniform. To add realism, you need to vary the size, rotation, opacity, and color of each piece. Then comes the issue of depth; confetti closer to the viewer should be larger and sharper, while pieces in the background should be smaller and slightly blurred. Achieving this level of detail manually requires advanced layer management and a significant investment of time.
Furthermore, consistency is key in professional design. If you are creating a series of invitations or marketing materials, ensuring that the confetti style remains cohesive across all assets is difficult when working manually. This is where a dedicated Confetti Effect for Photoshop addon becomes an invaluable resource. It bridges the gap between amateur attempts and professional-grade results, allowing users to focus on the creative concept rather than the mechanical execution.
How the Confetti Effect Addon Simplifies Your Workflow
The primary advantage of using a specialized confetti tool is efficiency. Instead of spending hours adjusting brush settings and layer styles, you can achieve complex results with a single click. The Confetti Effect for Photoshop typically operates through actions, layer styles, and custom brushes, integrating seamlessly into your existing workflow. This compatibility is crucial for professionals who rely on specific versions of the software. For instance, these tools are designed to work smoothly in Adobe Photoshop CS6, CC, and even Photoshop Elements 14 and 15, ensuring that regardless of your software version, you can access these powerful features.
One of the most significant benefits is the ability to customize. While pre-made templates are useful, every project has unique requirements. A high-end corporate event might require subtle gold foil accents, while a children’s party invitation demands vibrant, multi-colored shapes. A robust confetti addon provides a variety of styles and options, including gold, multi-colored, round, rectangular, small, and large variations. More importantly, it allows for customized color confetti, enabling you to match brand guidelines or specific theme palettes perfectly.
Exploring the Components: Actions, Styles, and Brushes
To truly leverage the Confetti Effect for Photoshop, it is helpful to understand the different components included in a comprehensive package. These tools are not just one-size-fits-all solutions; they offer layered flexibility for different design needs.
Automated Actions for Instant Results
Actions are perhaps the most time-saving feature. They automate the process of generating confetti layers with realistic properties. A typical set includes options such as:
- Round Colorful and Small: Ideal for dense, vibrant backgrounds.
- Rectangle Colorful and Small: Provides a more modern, geometric look.
- Round and Rectangle Gold: Perfect for elegant, luxury-themed designs.
- Custom Color Options: Allows you to input specific hex codes to match your project’s palette.
By clicking instantly on the Quick Start template, the action generates the confetti layers, applies the necessary blending modes, and adjusts the scaling. This means you are ready to print at 300 dpi almost immediately, ensuring high-quality output for physical invitations or posters.
Layer Styles for Depth and Texture
While actions create the distribution of confetti, layer styles add the visual depth that makes them look real. Simple confetti styles can look flat, but advanced layer styles introduce shadows, highlights, and textures. For example, Gold Foil styles simulate the reflective quality of metallic paper, adding a luxurious sheen that catches the eye. Similarly, custom color styles ensure that the lighting effects interact correctly with your chosen hues, maintaining realism even when deviating from standard colors.
Brushes for Manual Control
Sometimes, you need precise control over where the confetti falls. Custom brushes, such as Round Scattered Confetti or Rectangle Confetti brushes, allow you to paint confetti exactly where you want it. This is particularly useful for framing text or highlighting specific areas of an image. You can adjust the brush dynamics to vary the size and scatter, giving you the freedom to create organic, natural-looking clusters.
Practical Applications and Design Ideas
The versatility of the Confetti Effect for Photoshop means it can be applied to a wide range of projects. Here are a few practical scenarios where this tool shines:
- Event Invitations: Create eye-catching birthday, wedding, or baby shower invites. Use gold confetti for formal events and multi-colored rounds for casual parties.
- Social Media Graphics: Add excitement to promotional posts, sale announcements, or milestone celebrations. The bright colors and dynamic scattering help grab attention in crowded feeds.
- Product Photography: Enhance product shots by adding a festive atmosphere. For example, scatter confetti around a new perfume bottle or a gift box to suggest celebration and luxury.
- Digital Scrapbooking: Add a playful touch to digital memory books. The ability to customize sizes and colors allows for perfect integration with existing photos and layouts.
Tailoring the Approach to Your Needs
Different users will approach the Confetti Effect for Photoshop in different ways, depending on their skill level and project goals. Beginners may rely heavily on the Quick Start templates and pre-set actions, appreciating the ease of use and immediate results. They can let the tool handle the technical aspects of lighting and perspective, focusing instead on choosing the right colors and composition.
Intermediate and advanced designers, on the other hand, may use the tool as a starting point. They might generate a base layer of confetti using the actions and then manually adjust individual elements using the provided brushes and layer styles. This hybrid approach allows for maximum creativity, combining the speed of automation with the precision of manual editing. For instance, a designer might use the Gold Foil layer style for the main cluster of confetti but switch to a custom color style for background elements to create depth and contrast.
Considerations for Best Results
To get the most out of your confetti designs, keep a few best practices in mind. First, consider the background. Confetti stands out best against contrasting backgrounds. Dark backgrounds make gold and bright colors pop, while light backgrounds may require darker or more saturated confetti colors for visibility. Second, think about hierarchy. Do not let the confetti overwhelm the main subject or text. Use smaller, sparser confetti in areas where readability is crucial, and denser clusters in open spaces.
Finally, always check your resolution. Since these tools are designed for high-quality output, ensure your document is set to 300 dpi if you intend to print. This ensures that the edges of the confetti remain crisp and the details in the gold foil textures are preserved.
In conclusion, the Confetti Effect for Photoshop is more than just a decorative addon; it is a productivity tool that empowers designers to create joyful, professional-quality visuals with ease. By understanding the available options—from actions and layer styles to custom brushes—you can tailor the effect to suit any project, saving time while enhancing the emotional impact of your designs. Whether you are a novice looking for quick results or a pro seeking efficient workflows, mastering this effect opens up a world of creative possibilities.