Enhancing Mood and Depth: A Practical Guide to the Abstract Dark Portrait Photoshop Action
In the evolving landscape of digital photography and graphic design, post-processing is no longer just about correction; it is a fundamental component of artistic expression. Among the myriad tools available to creatives, specialized automation scripts have gained significant traction for their ability to streamline complex workflows. One such tool that has garnered attention for its specific aesthetic capabilities is the Abstract Dark Portrait Photoshop Action. This resource is designed to transform standard portraits into moody, high-contrast visuals with a distinct abstract quality, offering a bridge between technical efficiency and creative vision.
For photographers and designers aged 20 to 50 who are evaluating their toolkit, understanding the utility, limitations, and comparative advantages of this action is essential. It is not merely a filter but a structured workflow that requires specific inputs to yield optimal results. This article explores the functionality of the Abstract Dark Portrait Photoshop Action, compares it to manual editing and other automated solutions, and provides practical guidance on when and how to integrate it into your professional or personal projects.
Understanding the Core Functionality
The primary appeal of the Abstract Dark Portrait Photoshop Action lies in its ability to dramatically alter the tonal range and color palette of an image with minimal user intervention. Unlike basic presets that apply a uniform overlay, this action utilizes a non-destructive workflow. This means that the original image data remains intact, allowing for further customization and adjustment after the effect has been applied. This is a critical feature for professionals who need to maintain flexibility in their editing process.
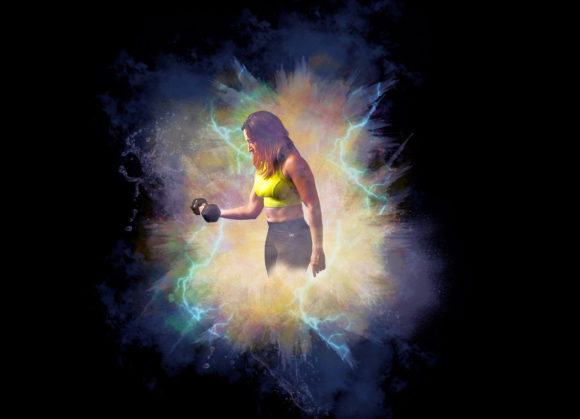
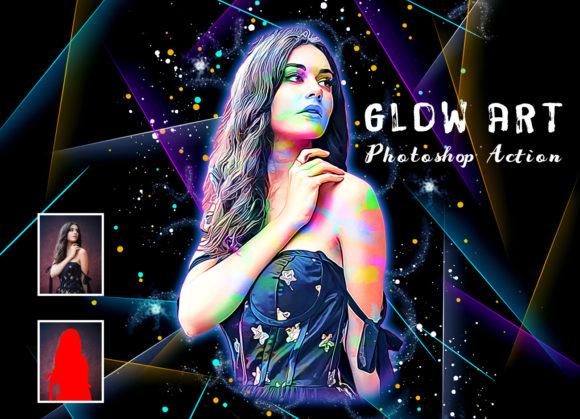
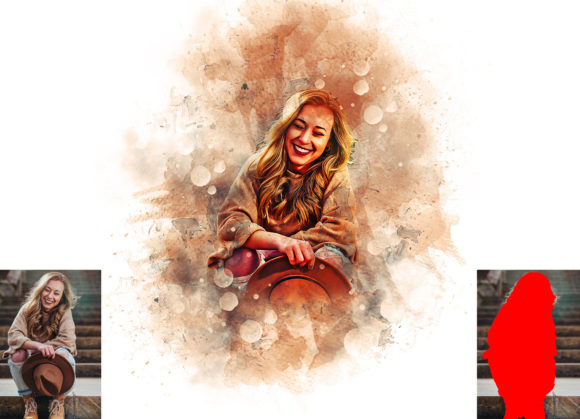
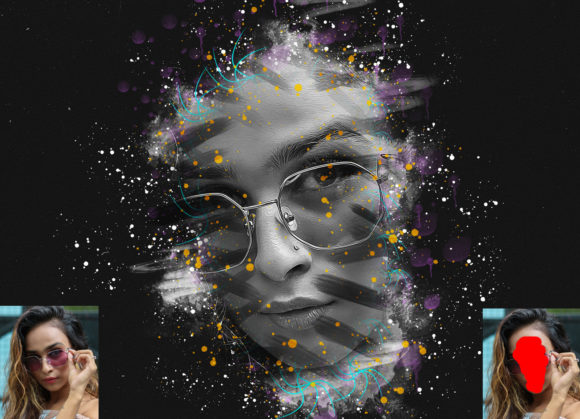
The action set includes ten different color options, providing a spectrum of moods ranging from deep, brooding blues to stark, high-contrast monochromes. When executed correctly, the action enhances the subject’s features while subduing the background, creating a sense of depth and isolation that is characteristic of abstract dark portraiture. The process relies on a specific preparation step: the creation of a "paint" layer. Users are instructed to open their photo, create a new layer named "paint" in lowercase, and use a soft brush to mark the areas they wish to highlight or protect. This manual input guides the algorithm, ensuring that the dramatic effects are applied selectively rather than uniformly across the entire canvas.
Technical Requirements and Compatibility
Before integrating any new tool into your workflow, compatibility is a primary concern. The Abstract Dark Portrait Photoshop Action is designed to work with a wide range of Adobe Photoshop versions, including CS4, CS5, CS5.5, CS6, and the Creative Cloud series from CC2014 through CC2020. This broad support makes it accessible to users who may not have upgraded to the latest software immediately, although it is optimized for the English version of Photoshop CC2020.
One of the most crucial aspects of using this action effectively is adhering to its technical specifications. The developer recommends resizing images to 3000px in width and 2000px in height with a resolution of 72 DPI before applying the action. This specific dimension ensures that the brushes and patterns included in the package scale correctly. Deviating from these dimensions can result in distorted effects or uneven application. The package includes a comprehensive PDF help file, which is invaluable for first-time users. It details the step-by-step process, from cropping to layer management, ensuring that even those less familiar with advanced Photoshop techniques can achieve consistent results.
Comparative Analysis: Automation vs. Manual Editing
When evaluating the Abstract Dark Portrait Photoshop Action, it is helpful to compare it against two primary alternatives: manual editing and generic preset packs. Each approach has distinct strengths and tradeoffs.
Manual Editing: Creating a dark, abstract portrait manually involves complex layer masking, curve adjustments, color grading, and potentially the use of third-party plugins. This approach offers unparalleled control and uniqueness but requires a significant time investment and a high level of technical skill. For a beginner or a professional working under tight deadlines, manual editing may not be feasible. The action serves as a middle ground, automating the tedious aspects of the process while still requiring user input via the "paint" layer.
Generic Presets: Many photographers rely on one-click presets or LUTs (Look-Up Tables). While these are fast, they often lack the nuanced control provided by an action that interacts with user-defined masks. Generic presets apply the same effect to every pixel, which can lead to washed-out subjects or overly dark backgrounds. In contrast, the Abstract Dark Portrait Photoshop Action allows for selective application, preserving the integrity of the subject’s face while enhancing the atmospheric elements of the image.
The key distinction here is the balance between speed and customization. The action is faster than manual editing but more customizable than a static preset. It is particularly well-suited for photographers who want to maintain a consistent style across a portfolio without spending hours on each individual image.
Best-Fit Situations and Limitations
Identifying when to use the Abstract Dark Portrait Photoshop Action is as important as knowing how to use it. This tool excels in scenarios where the goal is to evoke emotion through shadow and contrast. It is ideal for fashion photography, artistic portraits, and social media content where a bold, dramatic look is desired. The ten color options allow for versatility, enabling users to match the mood of the image to the brand or narrative they are conveying.
However, there are limitations. The action is not a magic bullet for poorly lit or low-resolution images. The requirement for a 3000x2000px canvas means that source images must be of sufficient quality. Additionally, the "paint" layer step, while simple, requires a basic understanding of brush tools and layer management. Users who expect a fully automated, one-click solution may find this initial setup cumbersome. Furthermore, because the effect is heavily stylized, it may not be suitable for corporate headshots or naturalistic documentary photography where authenticity and neutral tones are preferred.
Another consideration is the non-destructive nature of the workflow. While this is a strength, it also means that the final file size may be larger due to the multiple adjustment layers and masks created by the action. Users with limited storage or older hardware should be mindful of this potential impact on performance.
Practical Implementation Tips
To maximize the effectiveness of the Abstract Dark Portrait Photoshop Action, consider the following best practices:
- Start with High-Quality Images: Ensure your source photo is sharp and well-exposed. The action enhances contrast, so any noise or blur in the original image will be accentuated.
- Follow the Resize Protocol: Strictly adhere to the 3000x2000px at 72 DPI recommendation. This ensures that the included brushes and patterns align correctly with the image geometry.
- Master the "Paint" Layer: Take time to experiment with the soft brush on the "paint" layer. The areas you paint determine where the light and detail are preserved. Use a low-opacity brush for subtle transitions and a higher opacity for strong highlights.
- Explore All Color Options: Do not settle for the first color variant you try. Cycle through all ten options to see which one best complements the skin tones and background colors of your specific image.
- Consult the Help File: The included PDF guide contains detailed instructions and troubleshooting tips. Referencing it can save time and prevent common errors.
Making an Informed Decision
Choosing the right post-processing tool depends on your specific needs, skill level, and artistic goals. The Abstract Dark Portrait Photoshop Action is a powerful resource for those seeking to add a dramatic, abstract edge to their portraits without the steep learning curve of manual compositing. It offers a balanced compromise between automation and control, making it a valuable addition to the toolkit of both amateur enthusiasts and professional designers.
However, it is not a universal solution. If your work requires naturalistic tones or if you prefer complete manual control over every aspect of the edit, this action may not be the best fit. Similarly, if you are looking for a zero-effort, one-click solution, the required setup steps might feel like an unnecessary hurdle. By understanding the technical requirements, comparing it to alternative methods, and recognizing its ideal use cases, you can make an informed decision about whether this action aligns with your creative workflow. Ultimately, tools like this are meant to enhance your vision, not replace it, and their value is realized when used thoughtfully and intentionally.